
Integration guide
Documentation
Connect Tenable One Vulnerability Management to our platform
Tenable One VM is a native scan source, not an import. Its results enter the same unified risk view as our binary findings, closing the supply-chain blind spots that network and host scanning alone leave open.
After this guide you can
- Enable the Tenable One VM plugin as a controllable scan source
- Establish the API connection with your Tenable credentials
- Align triggered scans with your existing scan templates
- Read correlated Tenable and binary findings in one place
Contents
Step 1
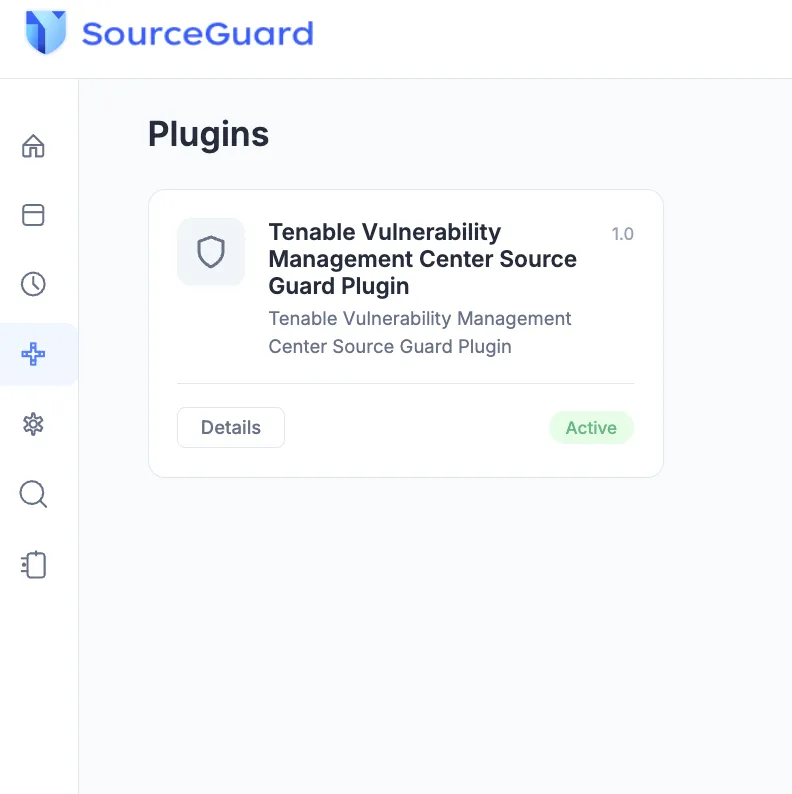
Access the Plugins page
After logging in, click Plugins in the left navigation bar.
Supported external scanning tools are listed, including the Tenable Vulnerability Management Center plugin.
Tenable One VM results are incorporated into the unified risk view alongside our platform's binary analysis. They are not kept in a separate tab.
Step 2
Configure settings
On the plugin card, click Details to open the Edit Plugin Configuration window.
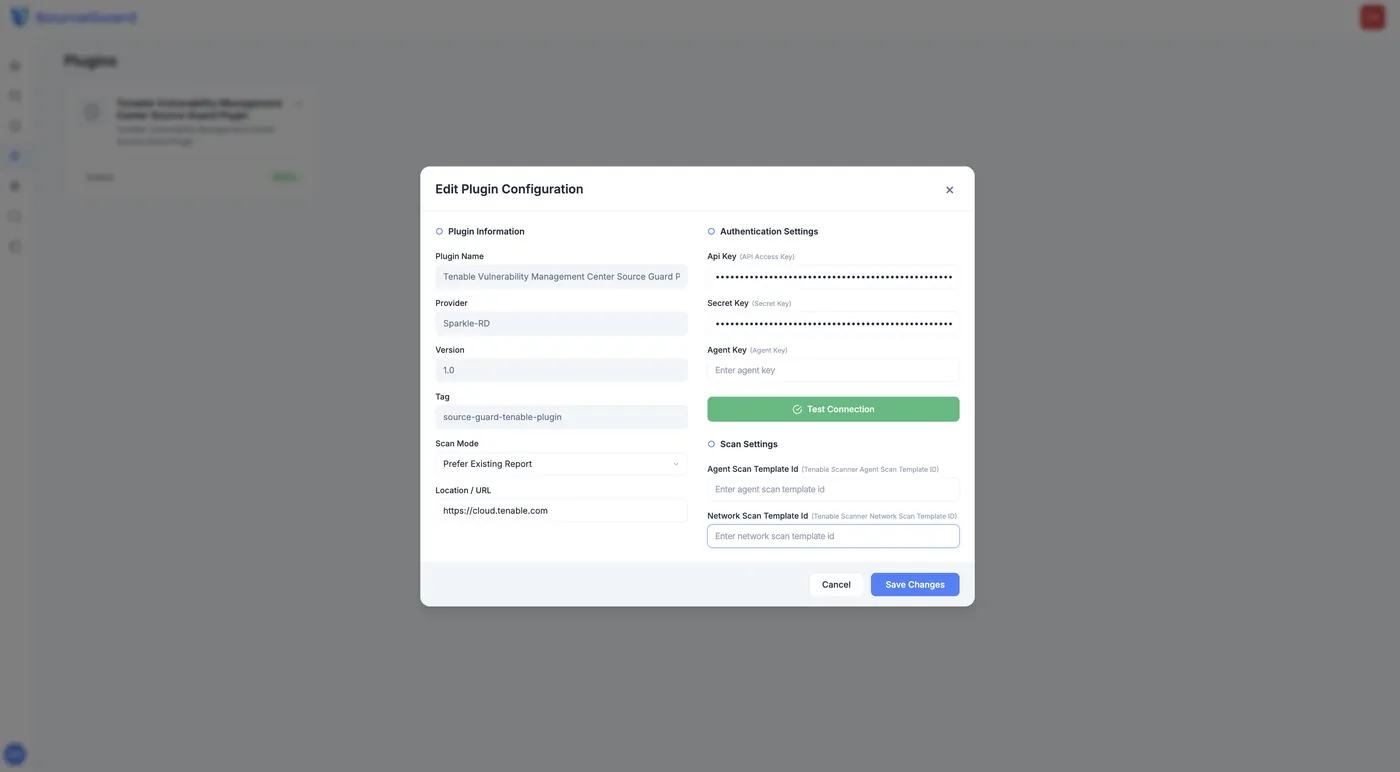
Plugin information
Scan Mode → Prefer Existing Report to avoid redundant scans.
Location / URL → https://cloud.tenable.com or your private URL.
Authentication
API Key, Secret Key and Agent Key, taken from the Tenable backend.
Scan settingsOptional
Agent and Network Scan Template IDs, to override default behaviour.
Step 3
Test and save
Click Test Connection to verify the integration.
Once successful, close the window. Our platform begins synchronising data according to your scan mode.
Step 4
Create a project and assign the scanner
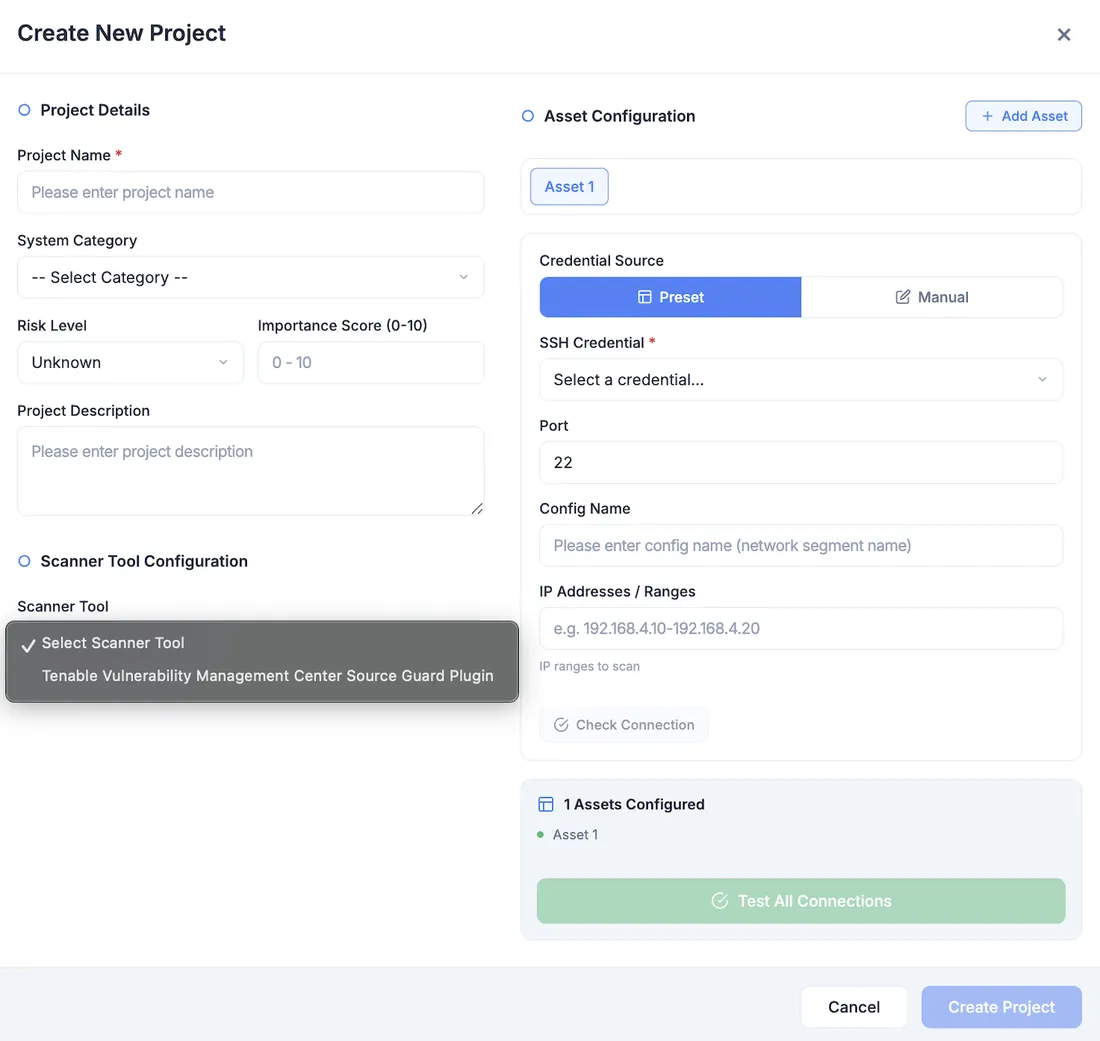
Click Create Project on the Project Management page.
Select or define the system category the project belongs to.
Set the baseline risk level and importance score.
Select the Tenable Vulnerability Management Centre plugin as the scanner.
Prefer existing report
Reuses the latest available Tenable report. Faster, and avoids redundant scans.
Always trigger scan
Forces a fresh scan every run. Most current data, but slower and consumes Tenable capacity.
Step 5
Add assets and launch the scan
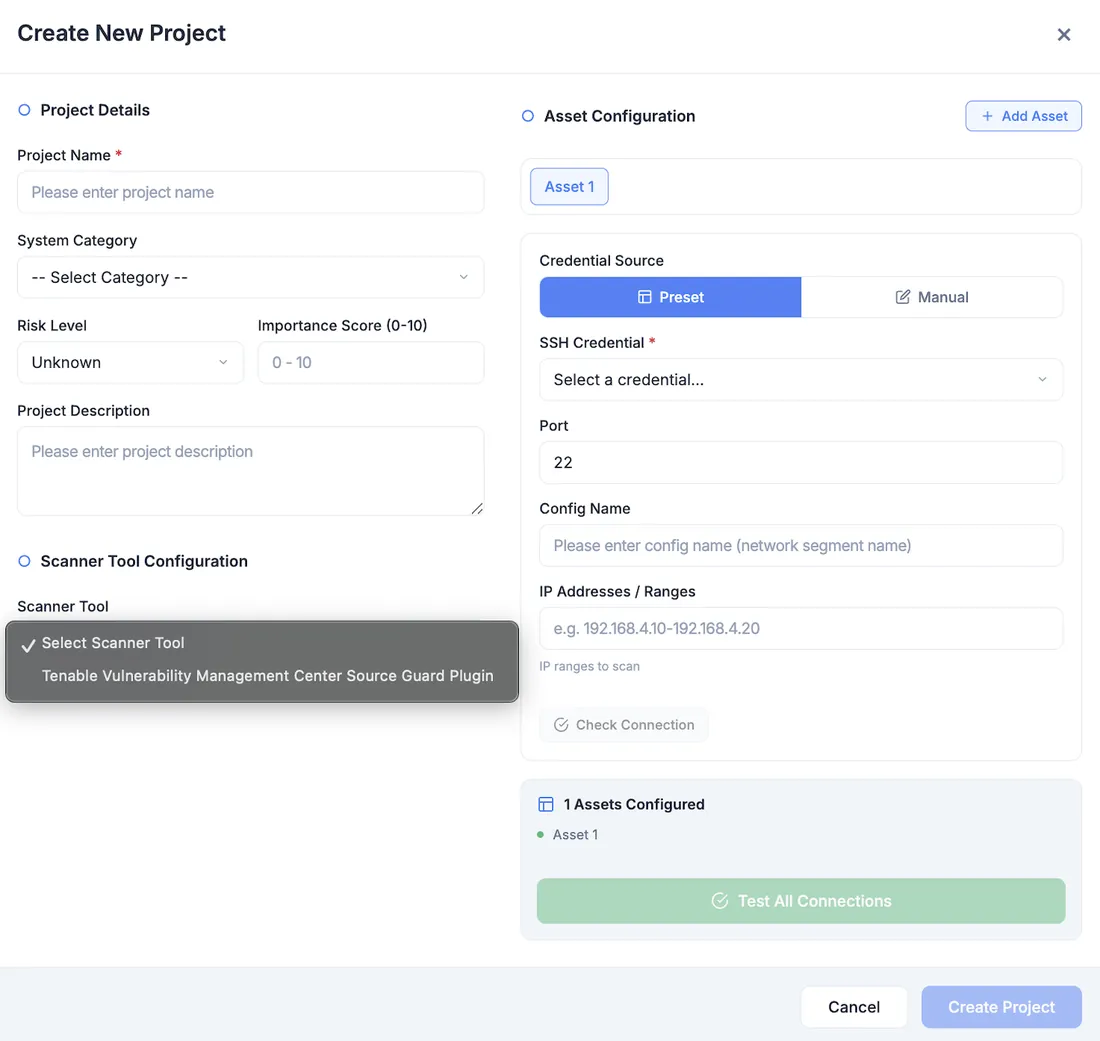
Asset settings
Credential source: preset, or entered once for this scan.
SSH credential and port number.
Config name for the segment or asset group.
IP range, e.g. 192.168.4.10-192.168.4.20
Validate
Check Connection per asset, or Test All Connections in bulk.
Finalise
Click Create Project or Save Changes to start the scan job.
Support
Stuck on the integration?
Our team handles product issues, integration questions and anything in between.
Contact support
[email protected]